Are you struggling to manage sciatica pain? Recent National Institutes of Health (NIH) studies suggest that yoga can effectively combat sciatica. The gentle stretching of the muscles and joints can reduce sciatic nerve pain. It can be combined with the mindful breathing associated with yoga.
This blog post will explore the best yoga poses for managing sciatic pain. We’ll also look at how yoga can be used to prevent sciatica from occurring in the first place.
What is Sciatica?
Sciatica is a common condition that causes pain, numbness, or tingling in:
- Lower back
- Hips
- Legs
- Feet
Sciatica can occur for various reasons. They include spinal stenosis, herniated disc, or injury. This discomfort is caused by pressure on the sciatic nerve. This runs from the lower back down to the legs.
According to the National Institute of Neurological Disorders and Stroke (NINDS), sciatica can affect anyone. No matter what their age or gender is.
Yoga is becoming increasingly popular as a complementary therapy for sciatica. One National Institutes of Health study found that yoga could improve mobility. It also reduces pain in people with chronic lower back pain, including sciatica.
How Can Yoga Help with Sciatica?
The pain can be debilitating and may impact one’s daily life activities. Fortunately, yoga can help relieve sciatic pain. Yoga for sciatica pain has been proven to be an effective non-invasive treatment.
One study by Harvard Medical School found that yoga is a safe and effective alternative to traditional treatments for sciatica. Participants in the study experienced a significant reduction in pain and disability levels after just eight weeks of practicing yoga.
Yoga helps alleviate sciatic pain in several ways. First, it strengthens the back, hips, and legs muscles. Stronger muscles can support the spine better. It can help prevent further compression of the sciatic nerve. Yoga also increases flexibility. It relieves tension and improves circulation in the lower back and legs.
Additionally, yoga can exacerbate sciatic pain. Deep breathing and mindfulness in yoga can manage stress and calm the body.
Some yoga poses particularly beneficial for sciatica pain include:
- Downward-facing dog
- Pigeon pose
- Seated forward bend
It’s important to note that not all yoga poses are suitable for individuals with sciatica pain. Some poses may worsen symptoms. It also puts too much pressure on the lower back. Consult with a qualified yoga instructor before starting a yoga practice for sciatica pain.
In summary, yoga is an effective way to manage sciatica pain. It can strengthen muscles, increase flexibility, promote relaxation, and alleviate lower back pain and leg tension. Consult a qualified instructor to learn the best yoga poses for your needs.
Types of Yoga Poses for Sciatica:
Several yoga poses can help alleviate sciatica’s pain, discomfort, and inflammation.
A. Gentle Stretching Poses:
Gentle stretching poses include:
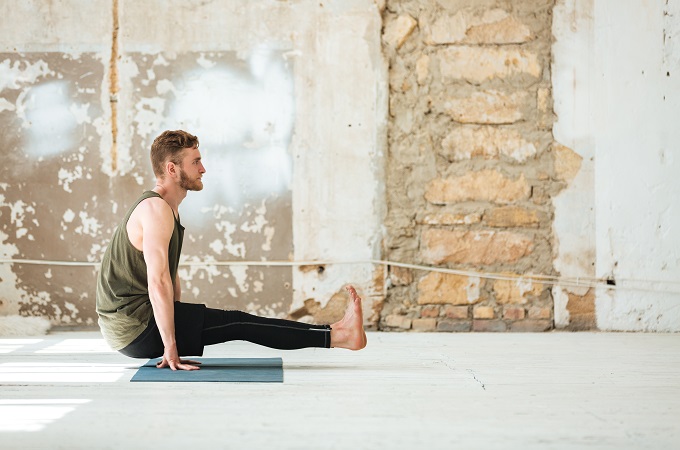
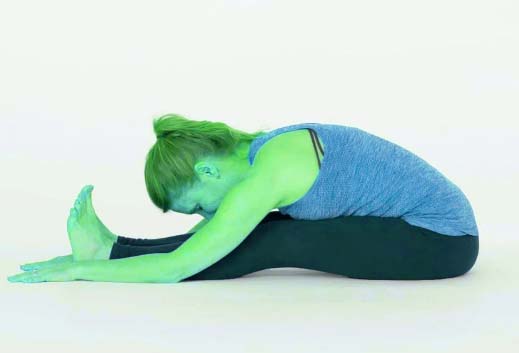
1. Seated Forward Bend:
The Seated Forward Bend pose, also known as Paschimottanasana, is a seated yoga pose that stretches the hamstrings, lower back, and shoulders. It is a calming and introspective pose that helps to release tension and promote relaxation. Here’s how you can practice the Seated Forward Bend pose:
1. Start by sitting on the floor with your legs extended in front of you. Sit on a folded blanket or bolster if you have tight hamstrings or difficulty sitting upright.
2. Align your sit bones firmly on the ground, grounding your pelvis and creating a stable base.
3. Engage your core muscles and lengthen through your spine, sitting up tall. Imagine reaching the crown of your head towards the ceiling.
4. Inhale and raise your arms overhead, elongating your spine.
5. Exhale and slowly hinge forward from your hips, leading with your chest. Reach your hands towards your feet, ankles, or shins. If you can’t reach comfortably, you can use a strap or belt around the soles of your feet and hold onto it.
6. Maintain a slight bend in your knees if you feel any strain in your hamstrings. The focus should be on the lengthening of your spine.
7. Allow your torso to relax and surrender into the pose. With each exhale, gently deepen the forward fold, allowing your upper body to gradually move closer to your legs.
8. If your lower back feels strained, you can modify the pose by placing a bolster or folded blanket on your legs and resting your torso on it for support.
9. Soften your shoulders away from your ears and relax your neck. If it’s comfortable, allow your head to hang naturally or rest it on your legs.
10. Stay in the pose for several breaths, maintaining a calm and steady breath. Allow your body to relax and release tension with each exhalation.
11. To come out of the pose, slowly engage your core muscles and inhale as you lift your torso back up to a seated position. Lengthen your spine and take a moment to notice the effects of the pose.
Remember, the Seated Forward Bend pose should be practiced with patience and respect for your body’s limitations. Avoid forcing yourself into a deep forward fold if it causes discomfort or pain. Over time, with consistent practice, your flexibility will gradually improve.
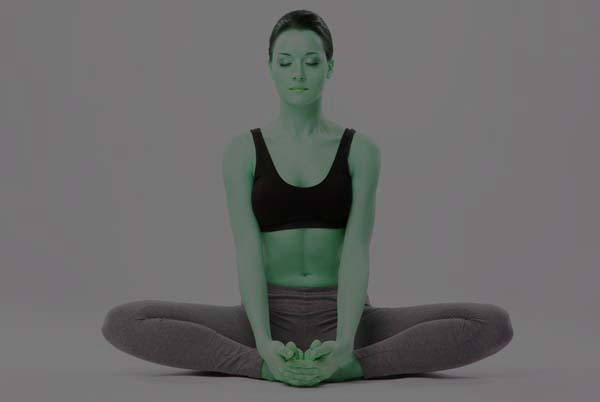
2. Butterfly Pose:
The Butterfly pose, also known as Baddha Konasana or Bound Angle pose, is a seated yoga pose that stretches the inner thighs, groins, and hips. It helps improve flexibility, opens up the hips, and stimulates the abdominal organs. Here’s how you can practice the Butterfly pose:
1. Start by sitting on the floor with a straight spine and legs extended in front of you.
2. Bend your knees and bring the soles of your feet together, allowing your knees to fall out to the sides. The heels of your feet should be as close to your groin as comfortable.
3. Hold onto your feet or ankles with your hands. You can also use your thumbs to hook onto your feet and wrap your fingers around the outer edges of your feet.
4. Sit up tall, lengthening your spine, and engage your core muscles.
5. Gently press your knees down towards the floor, feeling a stretch in your inner thighs and groin area. If you have tight hips, you may find it helpful to place folded blankets or blocks under your outer thighs for support.
6. Keep your shoulders relaxed and avoid rounding your spine. Instead, imagine lifting your sternum up towards the ceiling.
7. Allow your breath to be smooth and steady. You can focus on gently deepening the stretch with each exhale, allowing your knees to move closer to the floor.
8. If you feel any discomfort or strain in your knees, ease off the stretch and modify the pose by placing blocks or blankets under your knees to support them.
9. Hold the pose for several breaths, maintaining a relaxed and steady breath.
10. To release the pose, gently release the grip on your feet and extend your legs out in front of you.
Remember, as with any yoga pose, it’s important to listen to your body and practice with awareness. Avoid pushing yourself beyond your comfort zone and respect your body’s limitations. With regular practice, your flexibility in the Butterfly pose will gradually improve.
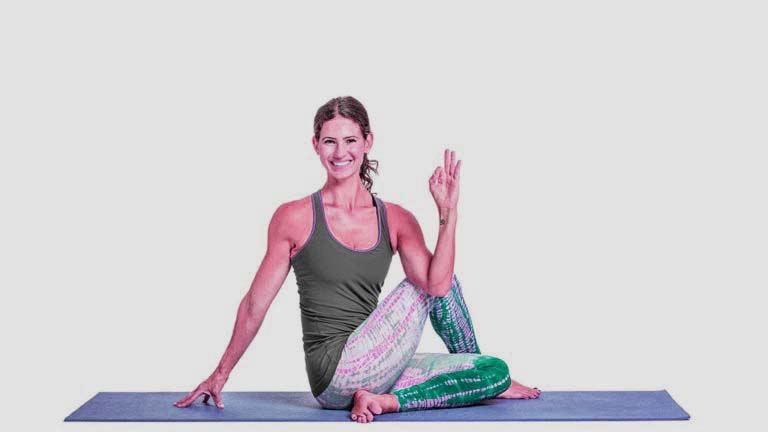
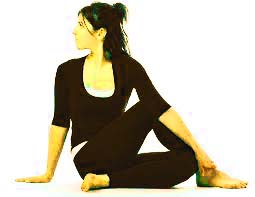
3. Half lord of the fishes pose :
The Half Lord of the Fishes pose, also known as Ardha Matsyendrasana, is a seated yoga twist that provides a deep stretch for the spine, hips, and shoulders. It stimulates the digestive system and helps improve spinal mobility. Here’s how you can practice the Half Lord of the Fishes pose:
1. Start by sitting on the floor with your legs extended in front of you.
2. Bend your knees and place your feet flat on the floor, close to your buttocks.
3. Slide your right foot under your left leg, bringing it to the outside of your left hip. The right heel should touch the left buttock.
4. Cross your left foot over your right leg, placing it on the floor next to the right knee. The left knee should be pointing up.
5. Inhale and lengthen your spine, sitting up tall.
6. As you exhale, twist your torso to the right. Place your left hand on the floor behind your tailbone for support.
7. Bring your right arm to the outside of your left thigh, hooking it around the left knee. Alternatively, you can place your right elbow on the outside of your left knee.
8. Inhale to lengthen your spine, and as you exhale, deepen the twist by gently rotating your torso further to the right.
9. Keep your neck aligned with your spine and gaze over your right shoulder if it feels comfortable for your neck.
10. Press your right hand firmly into the floor behind you, using it as a leverage to deepen the twist and lift your spine.
11. Hold the pose for several breaths, maintaining a steady and even breath.
12. To come out of the pose, inhale and gradually unwind the twist, returning to the center. Extend your legs in front of you and take a moment to observe the effects of the pose.
Remember to practice the Half Lord of the Fishes pose with awareness and respect for your body’s limitations. If you have any existing back or spinal issues, it’s advisable to practice under the guidance of a qualified yoga teacher. Modify the pose as needed, using props like a bolster or folded blanket for support. Always work within your own range of motion and avoid any discomfort or pain.
They can help to gently stretch the lower back, hips, and glutes. They can also help to relieve the pressure on the sciatic nerve.
B. Standing Poses:
Standing poses include:
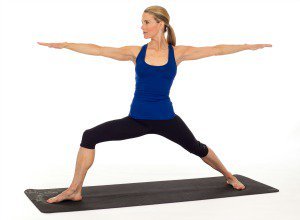
1. Warrior II Pose:
The Warrior II pose, also known as Virabhadrasana II, is a standing yoga pose that is often practiced as part of a flowing sequence or in isolation. It is named after the fierce warrior, Virabhadra, from Hindu mythology. The pose is known for building strength, stability, and focus.
To practice Warrior II pose, follow these steps:
1. Begin in a standing position at the top of your mat, with your feet hip-width apart and your arms relaxed by your sides.
2. Take a wide step back with your left foot, turning it slightly outwards at a 45-degree angle. Keep your right foot facing forward.
3. Bend your right knee, keeping it directly over your ankle. Make sure your knee is in line with your second toe. Your left leg should be straight and strong.
4. Extend your arms out to the sides at shoulder height, parallel to the floor. Your palms can face down or up, whichever feels more comfortable for you.
5. Keep your torso upright and gaze over your right fingertips. Your shoulders should be relaxed and away from your ears.
6. Engage your core muscles and lengthen through your spine. Ground down through the outer edge of your left foot and press firmly into your right foot.
7. Hold the pose for several breaths, maintaining a steady and even breath. If you’re comfortable, you can deepen the pose by sinking a little lower into your right knee.
8. To release the pose, straighten your right leg and step your feet back together. Repeat the same steps on the other side, stepping your right foot back and bending your left knee.
Warrior II pose stretches and strengthens the legs, opens the hips and chest, and improves balance and concentration. It can also help to build endurance and increase circulation throughout the body. As with any yoga pose, it’s important to listen to your body and modify or adjust as needed to avoid any discomfort or strain.
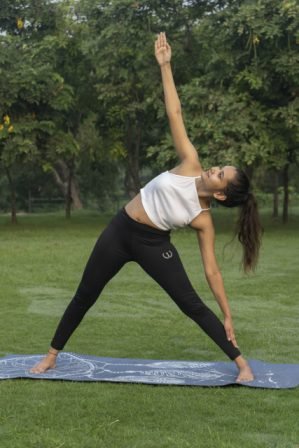
2. Triangle Pose:
The Triangle pose, also known as Trikonasana, is a standing yoga pose that provides a deep stretch to the hamstrings, hips, and side body. It also helps improve balance, core strength, and flexibility. Here’s how you can practice the Triangle pose:
1. Start by standing at the top of your mat with your feet hip-width apart. Take a step back with your right foot, turning it out at a 45-degree angle. Your left foot should be pointing forward.
2. Extend your arms out to the sides, parallel to the floor, with your palms facing down. Keep your shoulders relaxed and your gaze straight ahead.
3. Take a deep breath in and as you exhale, shift your hips towards the left and reach your left hand forward. Engage your core muscles to maintain stability.
4. Begin to lower your left hand down towards your left shin, ankle, or the floor on the outside of your left foot. Simultaneously, raise your right arm straight up towards the ceiling, keeping it in line with your shoulders.
5. Keep your chest open and your spine lengthened. Avoid collapsing into the pose by engaging your core and maintaining a strong stance.
6. Gently turn your gaze upward towards your right hand or keep it neutral if it strains your neck.
7. Hold the pose for several deep breaths, feeling the stretch along the left side of your body. Try to maintain balance and stability throughout.
8. To come out of the pose, press firmly into your feet, engage your core, and inhale as you rise back up to a standing position. Lower your arms back down to your sides.
9. Repeat the same steps on the other side, stepping your left foot back and extending your right arm out and down.
Remember, it’s important to listen to your body and modify the pose as needed. If reaching the floor is challenging, you can use a yoga block or place your hand on your shin for support. As with any yoga practice, focus on your breath and maintain a sense of ease and comfort in the pose.
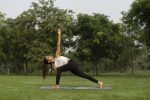
3.Extended Side Angle Pose :
The Triangle pose, also known as Trikonasana, is a standing yoga pose that provides a deep stretch to the hamstrings, hips, and side body. It also helps improve balance, core strength, and flexibility. Here’s how you can practice the Triangle pose:
1. Start by standing at the top of your mat with your feet hip-width apart. Take a step back with your right foot, turning it out at a 45-degree angle. Your left foot should be pointing forward.
2. Extend your arms out to the sides, parallel to the floor, with your palms facing down. Keep your shoulders relaxed and your gaze straight ahead.
3. Take a deep breath in and as you exhale, shift your hips towards the left and reach your left hand forward. Engage your core muscles to maintain stability.
4. Begin to lower your left hand down towards your left shin, ankle, or the floor on the outside of your left foot. Simultaneously, raise your right arm straight up towards the ceiling, keeping it in line with your shoulders.
5. Keep your chest open and your spine lengthened. Avoid collapsing into the pose by engaging your core and maintaining a strong stance.
6. Gently turn your gaze upward towards your right hand or keep it neutral if it strains your neck.
7. Hold the pose for several deep breaths, feeling the stretch along the left side of your body. Try to maintain balance and stability throughout.
8. To come out of the pose, press firmly into your feet, engage your core, and inhale as you rise back up to a standing position. Lower your arms back down to your sides.
9. Repeat the same steps on the other side, stepping your left foot back and extending your right arm out and down.
Remember, it’s important to listen to your body and modify the pose as needed. If reaching the floor is challenging, you can use a yoga block or place your hand on your shin for support. As with any yoga practice, focus on your breath and maintain a sense of ease and comfort in the pose.
They can help strengthen the legs and core muscles. They also support the lower back and alleviate pressure on the sciatic nerve.
Twisting Poses:
Twisting poses include:
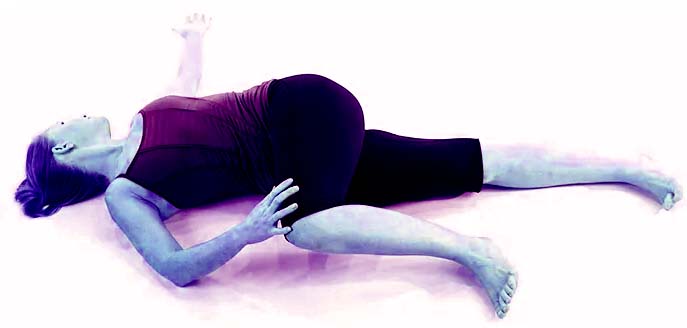
1. Spinal Twist Pose :
The Spinal Twist pose, also known as Ardha Matsyendrasana in Sanskrit, is a seated yoga pose that involves twisting the spine. It provides a gentle stretch to the back, shoulders, and hips while improving spinal mobility and digestion. Here’s how you can practice the Spinal Twist pose:
1. Begin by sitting on the floor with your legs extended in front of you. Straighten your spine and engage your core.
2. Bend your knees and place your feet flat on the floor, close to your buttocks.
3. Slide your left foot under your right leg and place it outside your right hip, with the left heel touching the right buttock.
4. Cross your right foot over your left leg and place it on the floor next to the left knee, with the right knee pointing up.
5. Inhale and lengthen your spine, lifting through the crown of your head.
6. As you exhale, twist your torso to the right. Place your left hand on the floor behind your tailbone for support.
7. Place your right hand on your left knee or wrap it around your left thigh, creating a gentle leverage to deepen the twist. Keep your shoulders relaxed.
8. As you inhale, lengthen your spine, and as you exhale, deepen the twist, gently rotating your torso further to the right.
9. Keep your neck aligned with your spine and gaze over your right shoulder if it feels comfortable for your neck.
10. Hold the pose for several breaths, maintaining a steady and even breath.
11. To release the pose, inhale and gradually unwind the twist, returning to the center. Extend your legs in front of you and repeat the pose on the other side.
Remember, it’s important to approach the pose with awareness and listen to your body. If you have any existing back or spinal issues, it’s advisable to practice under the guidance of a qualified yoga teacher. Modify the pose as needed, using props like a folded blanket or block for support or sitting on a folded blanket to elevate the hips if necessary. Always work within your own range of motion and avoid any discomfort or pain.
2. Half Spinal Twist Pose:
The Half-Spinal Twist pose, also known as Ardha Matsyendrasana, is a seated yoga pose that involves twisting the spine. It provides a gentle stretch to the back, hips, and shoulders while improving spinal mobility and digestion. Here’s how you can practice the Half-Spinal Twist pose:
1. Start by sitting on the floor with your legs extended in front of you. Straighten your spine and engage your core.
2. Bend your knees and place your feet flat on the floor, close to your buttocks.
3. Slide your left foot under your right leg and bring it to the outside of your right hip, with the left heel touching the right buttock.
4. Cross your right foot over your left leg, placing the right foot flat on the floor, with the right knee pointing up.
5. Inhale and lengthen your spine, lifting through the crown of your head.
6. As you exhale, place your right hand on the floor or a yoga block behind your back for support.
7. With your left elbow bent, bring your left arm to the outside of your right thigh, hooking it around the right knee. If you can’t reach the knee comfortably, you can place the left hand on the floor next to your right hip for support.
8. Inhale to lengthen your spine and as you exhale, gently twist your torso to the right, using the leverage of your left arm against your right leg to deepen the twist. Keep your shoulders relaxed and your neck aligned with your spine.
9. You can choose to gaze over your right shoulder or look straight ahead, depending on your comfort level.
10. Hold the pose for several breaths, maintaining a steady and even breath.
11. To release the pose, inhale and gradually unwind the twist, returning to the center. Extend your legs in front of you and repeat the pose on the other side.
Remember to practice the Half-Spinal Twist pose with awareness and respect for your body’s limitations. If you have any existing back or spinal issues, it’s advisable to practice under the guidance of a qualified yoga teacher. Modify the pose as needed, using props like a folded blanket or block for support. Always work within your own range of motion and avoid any discomfort or pain.
They can help release tension in the lower back and hips. They also reduce pressure on the sciatic nerve.
One study published in the International Journal of Yoga Therapy found that a 12-week yoga program significantly improved pain, function, and quality of life for individuals with chronic sciatica.
Another study published in the Journal of Alternative and Complementary Medicine found that yoga effectively reduced pain and improved functional disability in individuals with acute sciatica.
In addition to these studies, several institutions, such as the National Center for Complementary and Integrative Health and the American Pain Society, have recognized the potential benefits of yoga for managing chronic pain conditions, including sciatica.
Benefits of Practicing Yoga for Sciatica:
Here are some of the benefits of incorporating yoga into your sciatica management routine:
- Improved flexibility:
Sciatica can cause stiffness in the muscles. This leads to discomfort and limited mobility. Yoga poses can help to stretch and lengthen these muscles. They also promote greater flexibility and range of motion.
- Strengthened core muscles
The core muscles play a crucial role in supporting the spine. It reduces the pressure on the sciatic nerve. The plank and boat pose can help to strengthen these muscles. It reduces the risk of future sciatic flare-ups.
- Reduced stress and anxiety:
Practicing yoga has been shown to reduce stress and anxiety. It promotes greater relaxation and a sense of calm.
- Improved circulation:
Sciatica can lead to poor circulation in the legs and feet. It causes discomfort and even numbness. Yoga poses, stretching and bending the legs and hips can improve circulation. It reduces these symptoms.
- Better posture:
Poor posture can exacerbate sciatica symptoms. Yoga poses that focus on improving posture can help to alleviate these symptoms. They also reduce the risk of future flare-ups.
Incorporating yoga into your sciatica management routine can provide many benefits. They improve flexibility and circulation to reduce stress and anxiety. With regular practice and guidance from a qualified instructor, yoga can help you to manage your sciatica symptoms and live a more comfortable, pain-free life.
Tips for Practicing Yoga for Sciatica:
It’s important to do it in a way that is safe and effective. Here are some tips to keep in mind:
- Talk to your doctor first:
Before starting any new exercise routine, it’s important to consult with your healthcare provider. Make sure that it’s safe for you.
- Start slowly:
If you’re new to yoga or have limited mobility due to sciatica, start with simple poses and gradually work your way up.
- Use props:
Blocks, blankets, and straps can help make yoga stretches for sciatica more accessible and comfortable.
- Focus on your breath:
Mindful breathing can help you stay calm and focused during your yoga practice and can also help reduce pain and inflammation.
- Listen to your body:
If a pose feels uncomfortable or painful, back off or modifies it. Always honor your body’s limitations and never push yourself beyond what feels safe.
Remember, yoga can be a great way to manage sciatica. But it’s important to approach it mindfully and carefully. By following these tips, you can enjoy yoga’s many benefits while keeping your body safe and healthy.
Conclusion:
Sciatica is a common condition that affects many people, regardless of age or gender.
Yoga has been proven to be an effective way to manage sciatica pain, providing a non-invasive treatment that can alleviate discomfort and improve daily life activities.
The gentle stretching and strengthening of the muscles and joints, combined with the mindful breathing associated with yoga, can reduce sciatic nerve pain and improve flexibility.
By practicing yoga regularly, individuals with sciatica can improve their mobility, reduce pain and disability levels, and improve their overall quality of life.