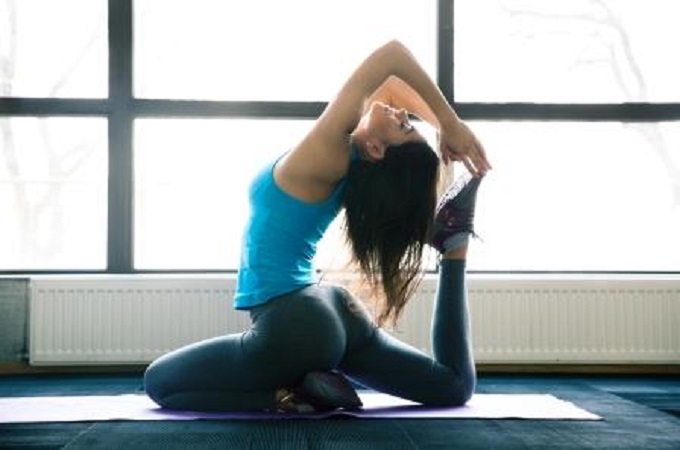
What you do in the morning has a greater effect on your rest of the day. Therefore, an easily accessible daily morning ritual can set you up for success without considering where you live and what your day ahead holds for you.
If you’re a beginner, we suggest you make home practice regularly in the morning when your body is refreshed. Although it is a bit harder to motivate yourself in the morning without encouragement, we are here to assist you by spurring you on with our morning yoga sequences.
Early morning yoga for a few minutes is wonderful for beginners to increase their blood flow and keep them focused. The poses focus on strengthening and lengthening your body and losing your key muscles. It also allows you to feel flexible and fit in mind, body, and spirit.
Here are some 10 minute morning yoga poses for beginners that can optimize your mind, mood, and health to start your day off on the right foot. The best part? You can perform these at your own home.
10 Minute Morning Yoga Sequence for Beginners:
1. Tadasana Pose:
Starting in Mountain or Tadasana yoga pose is an excellent place to begin. This move improves your self-esteem and strengthens your legs.
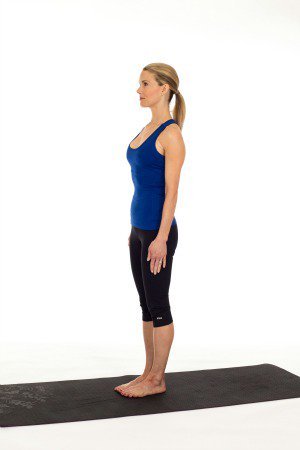
How to Do Tadasana Yoga Pose :
- Get into the position.
- Keep your feet apart up to hip width or bring them together until your toes touch.
- Press the mat through all the corners of each foot.
- Lengthen the body and stretch the hands below the shoulders.
- Inhale and exhale the air while drawing your abdominals in and up.
- Hold on for 5 to 8 breaths.
2. UrdhvaHastasana (Raised Hands Pose):
This pose stretches the shoulders, armpits, spine and belly. It improves digestion and reduces anxiety and fatigue. It also builds space in the chest.
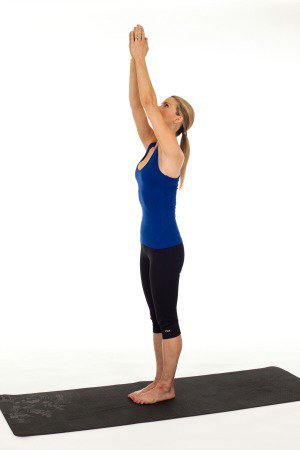
How to Do UrdhvaHastasana (Raised Hands Pose):
- Stand on the mat and keep your feet together
- Straighten your arm in the air.
- Point your tailbone towards the ground
- Gently press your palms together
- Make sure your triceps are away from your ears
- Hold the pose for a few breaths
3. Warrior I Pose:
This pose works for your great upper back; it opens the chest and stretches the hip flexors. It also strengthens your shoulders, hamstrings, spinal extensors, and quads. Warrior 1 usually practices in the AM.
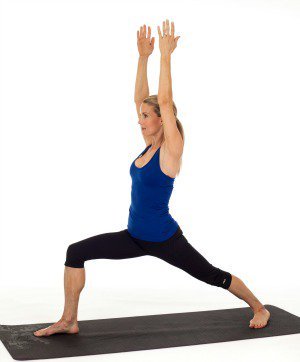
How to Do Warrior I?
- Position your body in a raised hand pose.
- Step your left foot back up to 3 or 4 feet length at 45 degree.
- Bend your right knee at a 90-degree angle while moving your upper body forward
- Stay here for a while
4. Warrior II Pose:
This pose develops a stretch in the legs, groin, ankles, and hips. It also engages and strengthens your abdomen, arms, shoulders, and legs.
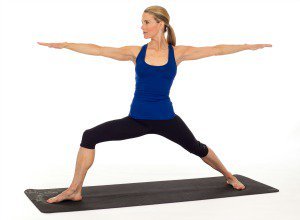
How to Do Warrior II?
- While keeping your body in the Warrior 1 position on the right side
- Turn your head to the right and examine your right hand finger.
- Open up your hips, arms, and waist to the side
- Engage your torso between the legs
- Draw your breath in and out
- Stay in this position for five to eight breaths
5. Trikonasana (Triangle Pose):
Trikoonasana is a Sanskrit word. “Trikona” means “triangle” and “asana” means “pose”. This is a standing pose that lengthens and strengthens your groin and hamstrings. It also stretches the hips.
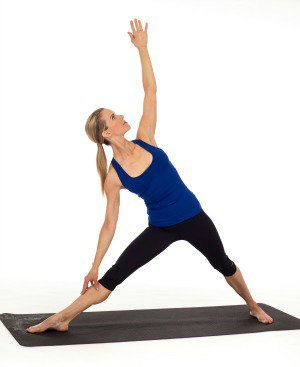
How to Do Trikonasana (Triangle):
- From the Warrior 2 position, straighten your front leg.
- Flex your body.
- Place the right hand on the right leg knee
- Straighten your left hand up in the air
- Hold the pose for a few breaths
- Come back to the standing position again
6. Utthita Parsvakonasana (Extended Side Angle Pose):
The Extended Side Angle Pose is a hip opener pose. This focuses on obliques, quadriceps, shoulders, glutes, and hip flexors.
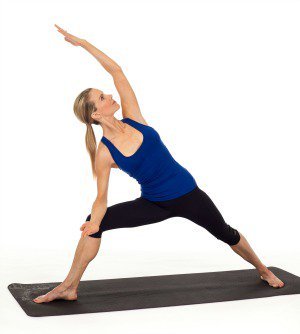
How to Do UtthitaParsvakonasana(Extended Side Angle):
- Flex your right leg knee
- Place the outer right forearm on the right thigh of the right leg
- Lengthen the left arm overhead, starting at the outside of the left foot and continuing all the way to the left fingers.
- Hold the pose for a while
- Fold both legs and lower your hands along the legs
- Come back to the raised hand pose
7. AdhoMukhaSvanasana (Downward Dog Pose):
This pose opens the calves, Achilles tendon, and hamstrings. As you lower your head, blood flows to your brain. Therefore, it also empowers your brain and releases tension from your back and neck.
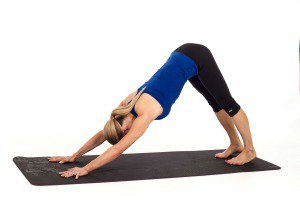
How to Do AdhoMukha Svanasana (Downward Dog):
- Keep yourself in a standing position
- Bend forward and place your hands on the floor
- Step back with both legs
- Press your hands firmly and roll your upper arms outward
- Keep your abdomen engaged
- If it is tight for you, you can bend the knees
- Hold the pose for a few seconds
8. Forearm Plank Pose:
The straight-arm plank strengthens the core and triceps. It is the most preferred practise for those who want to build their upper body strongly. It also targets the abs.
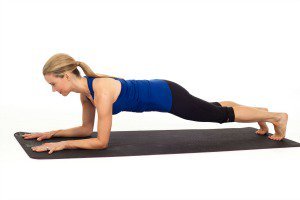
How to Do Forearm Plank:
- From a downward-facing dog pose stance, drop your hands and knees
- Place the front part of your upper arms on the mat
- Ensure that your body is in a straight line from top to toe to head
- Engage your abdominal muscles and hold this pose for thirty to sixty seconds
- This will fire up your powerhouse for the rest of the day
9. Bhujangasana (Baby Cobra Pose):
This is one very basic pose for beginning yogis. It strengthens your glute and spine. It also stretches the abs, chest, and shoulders.
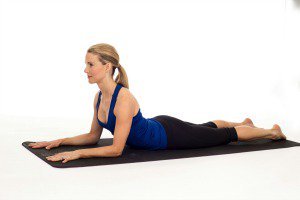
How to Do Bhujangasana (Baby Cobra):
- From forearm plank, slightly move your hands forward way
- Place your belly on the mat
- Raise your chest up to form a Baby Cobra pose
- Down your back and pull and your shoulder blades back
- Hold this for 7 breaths and repeat the pose for two or three time
10. Child’s Pose:
The child’s pose strengths your back and hip muscles.
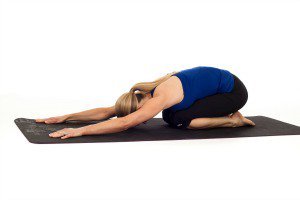
How to Do Child’s Pose:
- After finishing the baby cobra, kneel down and place your buttock between your heels
- Bow your whole upper body forward
- Place the upper body on the thighs while exhaling
- Relax the neck muscles by lowering your head to the mat
- Stay here for 30 seconds
11. Happy Baby Pose:
This strengthens your hips and back. The lower back, inner thighs, and hip muscles work greatly in this pose.
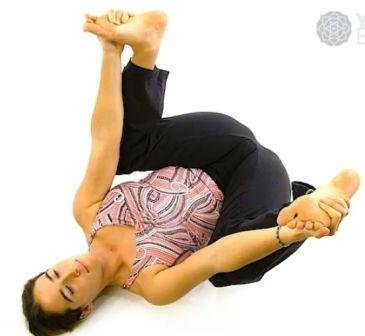
How to Do Happy Baby:
- Sit on the mat with your hips touching the floor
- Lower down on the back while bending the knees
- Put them in your stomach
- Grasp your foot
- Bend your ankles and heels
- Gently shake your legs right and left
- Hold it for a few seconds
Final Words:
Developing the proper morning yoga routine may be an energizing and extremely helpful practice, regardless of your level of experience.
10 minutes morning yoga for beginners may transform their life in so many positive ways. It improves emotional awareness and helps you respond more skillfully to obstacles in daily life. If you are new yogi, set aside some time for yourself each morning, you will feel calm, cheerful, and able to live in the moment.

